Sunday, March 3, 2013

Genius!

This is the best idea I have ever had! 
Easy scrap yarn organization/storage. 

I work at a clinic where we use hundreds of syringes. Normally we recycle the plastic container they come in, but one day while working on a project over my lunch hour I thought of this: 


It's perfect for the bits of yarn I'm using for my beekeepers quilt. The cap holds the yarn in place so I can wrap it and then I tuck the end right back into the cap and secure it in place! 

Genius I tell you! 


Tuesday, February 26, 2013

Stupid Groundhog!

Kansas City is shut down again due to snow. Which is fine by me since it kicks my knitting into high gear! But I really can't wait for spring....Also my computer is broken and my husband is not good at sharing. :-)

Tuesday, February 19, 2013

Weird Thrift Store Find Of The Week!


If you need duck or chicken towel hangers (?) they can be found here:

Salvation Army
6219 Johnson Dr
Mission, KS
(913) 384-3321

You could hang so many towels! On duck heads. 
You could have a flock on your wall. 

Tuesday, February 12, 2013

Inexpensive Curtains

I made myself a new set of curtains on Saturday. Curtains are one of those things, and there are many, that I refuse to spend any great deal of money on. So basic, so easy, so not worth $20 a panel! 

So I did this:


Two tablecloths turned into two curtain panels. 


If you can sew a straight line you can make curtains. Find some fabric you like and save yourself a bunch of money. 


Thursday, February 7, 2013

Weird Thrift Store Find of the Week


Pig in a jar. 


? 


Can be found at:
Maj R Thrift
2842 W. 47th Ave.
Kansas City KS  66103
913.362.5001
 

Saturday, February 2, 2013

Free Pattern! Love Knot Crocheted Bag

Love Knot Bag


Materials

  • Super Bulky Weight Yarn, (2) 6oz skeins
  • Size H Crochet Hook
  • 7" Diameter Bamboo Purse Rings (2)
  • Yarn Needles
Gauge
  • In sc, 3sts and 3 rows = 1"
  • In pattern, 4 double knot sts and 6 rows = 4" (measuring from sc at center of 1 knot st to center of  next st). 
Abbreviations
  • sc = single crochet
  • ch = chain
  • YO = yarn over
Worked as Front and Back sewn together. Front and back worked the same. 

Begin with Ch 37
Row 1: Sc in 2nd ch from hook and in each ch across. (36sc)

Row 2: Ch 1, turn; sc in each sc across. 

Repeat row 2 until piece measures approx 5" from beginning, do NOT finish off. 

Begin Mesh
Pattern Row 1: * Pull up loop on hook to measure 1/2", YO and draw through loop on hook, holding back single strand with thumb and middle finger, insert hook between 1/2" loop and single strand (fig A), YO and draw through (2 loops on hook), YO and draw through 2 loops on hook (single knot made), pull up loop now on hook to measure 1/2" (fig B), YO and draw through loop on hook, insert hook between 1/2" loop and single strand (fig C), YO and draw through (2 loops on hook), YO and draw through 2 loops on hook (double knot st made), skip next 2 sts, sc in next st; rep from * across row, ending with sc in last st: 4 double knot sts. 

Pattern Row 2: Work 1 double knot st and 1 single knot st, sc in center of first double knot st (fig D),  work double knot st, * sc in center of next double knot st, work double knot st; repeat from * across, ending with sc in last st. 

Repeat pattern row 2 until piece measures approx 14" from beginning; do NOT finish off. 

Join piece to ring by working sc around ring and into center of double knot st of last row, * 2 sc around ring, sc around ring and into center of next double knot st; repeat from * across; finish off. 

Finish
Beginning 3" below ring, seam pieces together by sewing down one side, across bottom and up remaining side, ending 3" below ring. 


Pattern originally found in "Must Have Bags"
Designed by Linda Dec Vikla


Try this book to find more beautiful stitches---be INSPIRED! 


Thursday, January 31, 2013

Can Can

The other day I was looking at my big bag of make-up and decided to organize the stuff instead of constantly digging around, wasting time, looking for the stuff I want. I wanted something simple, and easy, and cheap! This is what I came up with:


Organize by upcycling cans and plastic containers!


Simply wrap can, plastic or cardboard container in pretty scrapbook paper! 
Easy and cheap!! 


Note: I added some foam into each can to make them shallower, so my items would stick out instead of being barely visible. 


Friday, January 25, 2013

Chevron #1

I have fallen in love with the chevron st, so I decided to share a an easy wave with you. 


Originally Published in The Complete Book of Knitting Crochet & Embroidery (70s)


Book recommends crochet hook size G and knitting worsted in various colors. 

Work a multiple of 17 sts + 4

1st row:     Into 4th ch from hook work 3dc, **1dc into each of next 5ch, *yo and insert hook into next ch, yo and draw through a loop, yo and draw through first 2 loops on hook, yo and insert hook into next ch, yo and draw through a loop, yo and draw through first 2 loops on hook, yo and draw through all 3 loops on hook - called dec 1 dc -, *, rep from * to * twice more, 1dc into each of next 5ch, 4dc into next ch, rep from ** to end. Turn

2nd row:     3ch to count as frist dc, skip first 2 sts, 3dc into next st, *1dc into each of next 5 sts, dec 3dc over next 6 sts, 1dc into each of next 5 sts, 4dc into next st, rep from * ending last rep with 4dc into 3rd of 3ch. Turn. 

Repeat 2nd row throughout, alternating the colors as desired. You will that the pattern gives a flowing, wavy line. 

Abbreviations
st(s) = stitch(es)
ch =  chain
dc = double crochet
rep = repeat
*...* = repeat the pattern between
dec = decrease
yo = yarn over

Although this pattern calls for double crochet throughout I have used it with single, and treble, even mixing all three for a very interesting and textured look. 

Wednesday, January 23, 2013

Crocheting in the round

I can never, ever get it right! I'm trying to make a bag right now, and I want to add different colors to it so I'm trying to be good about keeping track of where my row begins and ends. The problem is I am always gaining or losing stitches. 


Crocheting is weird! I'm a knitter by nature, and it just makes more sense to me. I can clearly see where the stitches are and know what I have to do! Someone help me! 

I've watched a bunch of youtube videos on it and still don't get it. I'm hopeless.

Monday, January 21, 2013

Cogwheel Eyelet Pattern


Cogwheel Eyelets

Knitting Pattern: Use a multiple of 8 + 1 Stitches

Note: When instructed to slip stitches, always slip as if to knit. 

Row 1:     (Right Side) K2, K2tog, YO, K1, YO, slip 1, K1, PSSO, * K3, K2tog, YO, K1, YO, slip      1, K1, PSSO * Repeat as desired until last 2 sts, K2 

Row 2:     Purl across. This applies to all wrong side or even rows. 

Row 3:     K1, * K2tog, YO, K3, YO, slip 1, K1, PSSO, K1 *

Row 5:     K2tog, YO, K5, * YO, slip 1, K2tog, PSSO, YO, K5 * Repeat across to last 2 sts, YO, slip 1, K1, PSSO 

Row 7:     Slip 1, K1, PSSO, YO, K5, * YO, slip 2 tog, K1, P2SSO, YO, K5 * Repeat across to last 2 sts, YO, K2tog

Row 9:     Repeat Row 7

Row 11:   K2, YO, slip 1, K1, PSSO, K1, K2tog, * YO, K3, YO, slip 1, K1, PSSO, K1, K2tog * Repeat across to last 2 sts, YO, K2

Row 13:   K3, Yo, slip 1, K2tog, PSSO, * YO, K5, YO, slip 1, K2tog, PSSO * Repeat across to last 3 sts, YO, K3

Row 15:   K1, * YO, slip 1, K1, PSSO, K3, K2tog, YO, K1* 

Row 17:   K2, YO, skip 1, K1, PSSO, K1, K2tog, * YO, K3, YO, slip 1, K1, PSSO, K1, K2tog * Repeat across to last 2 sts, YO, K2

Row 19:   K3, YO, slip 1, K2tog, PSSO, * YO, K5, YO, slip 1, K2tog, PSSO * Repeat across to last 3 sts, YO, K3

Row 21:   K3, YO, slip 2 tog, K1, P2SSO, * YO, K5, YO, slip 2 tog, K1, P2SSO * Repeat across to last 3 sts, YO, K3

Row 23:   Repeat Row 21

Row 25:   K1, * K2tog, YO, K3, YO, slip 1, K1, PSSO, K1 * 

Row 27:   K2tog, YO, K5, * YO, slip 1, K2tog, PSSO, YO, K5 * Repeat across to last 2 sts, YO, slip 1, K1, PSSO

Row 28:   Purl across

Repeat rows 1-28 for pattern. 

Abbreviations
*.....* = Repeat pattern between points across your work
St(s) = Stitch(es)
K = Knit
P = Purl
YO = Yarn Over
K2tog = Knit 2 Stitches Together
Slip 2 Tog = Separately slip 2 stitches as if to knit
PSSO = Pass Slipped Stitch Over the stitch just made
P2SSO = Pass 2 Slipped Stitches Over the stitch just made


Pattern Originally Published in "99 knit stitches" Published by Leisure Arts


Sunday, July 15, 2012

Dumpster Find!


Ya, I don't know why either. 


But I couldn't leave it in the 
paper recycling dumpster. 
That's just crazy! 


Happy Sunday!!


Saturday, July 7, 2012

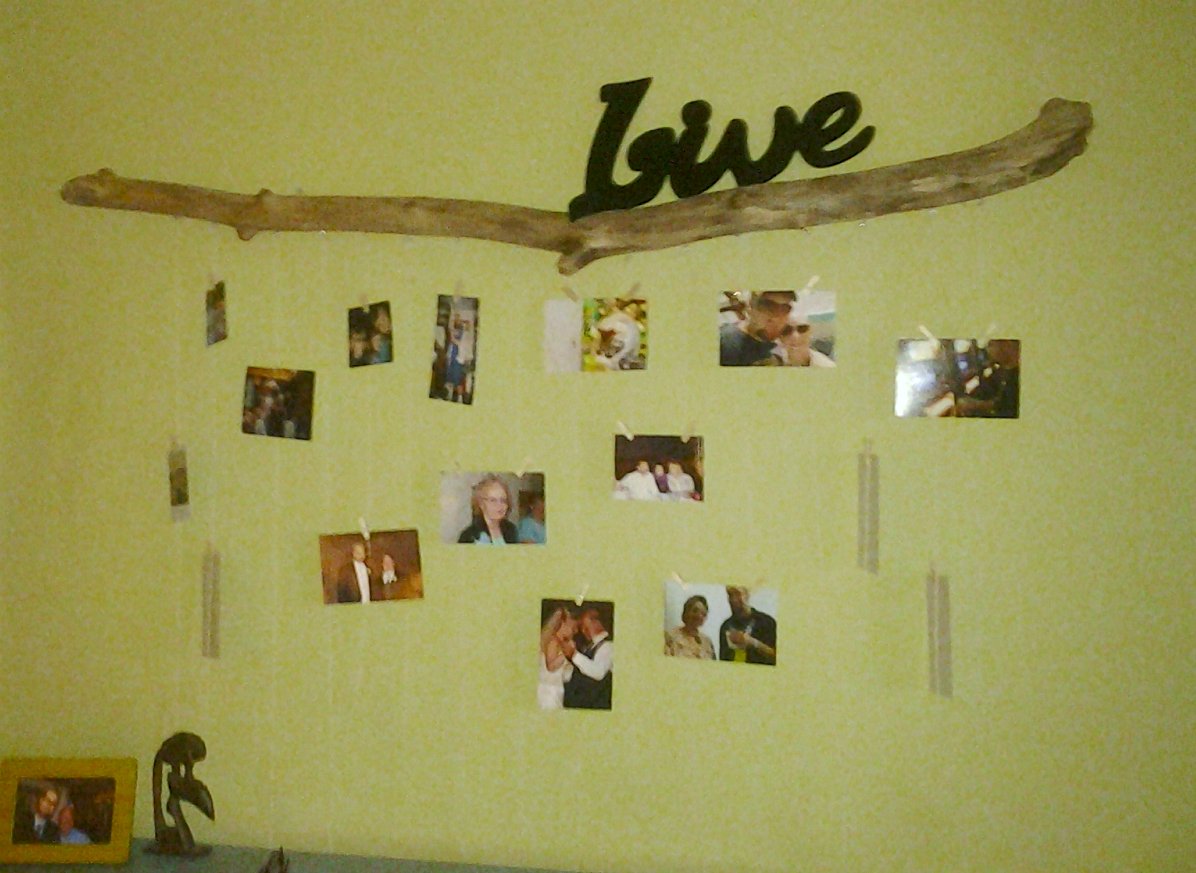
Driftwood Picture Hanger

I was wondering around Pinterest and came across this:


I liked it but decided  to go bigger:


This was a piece of driftwood we collected in Duluth. I liked it but didn't know what to do with it. Now it has a purpose. I plan to add more pics and move the buffet that sits under it so it becomes the main feature. 

Fun and easy piece! 

Friday, June 22, 2012

Homemade Lantern, er, sorta....

So. I'm reading this book, The Man Who Quit Money, by Mark Sundeen. It's about this guy who decides that money is just a made up stupid thing and he's not going to use it anymore. It's pretty interesting, although I'm only about 30 pages in.

I stopped reading when I came across this, "Oil lamps arranged on small rock ledges around the cave are a more reliable light source. To make one he simply fills a glass jar with vegetable oil, then inserts a short length of cotton cord into a wine cork, which floats on top. A tinfoil barrier keeps the cork from catching fire, and the wick burns for days."

Oh, easy. I'm totally making one of these. So, without consulting the interweb, youtube, or putting much thought into the idea, I decide to set out and make one.

This craft is slightly dangerous and involves an open flame. Please use caution if you attempt to make one yourself. Please find better instructions, please.

Step One. Find a Jar.
Check.

Step Two. Dig up a cork, cotton yarn, and tin foil. 
                       Check.           Check.          And Check. 

Step Three. Vegetable Oil. Check. 

With supplies in hand I set out to create this easy little lantern. A lantern that a man living in a cave uses as a light source. 

Of course, to set the mood one of the first things I do is cut myself. 
Sure, it doesn't look like much but it hurt ok?

Nevermind that, I tell myself. I throw the cotton into some oil to let it soak for a while, drill a hole through my cork, and cut the tinfoil to size. Then I thread my yarn through the cork, and put the tinfoil around the cork and drop it in, where it sinks to the bottom...

It took some finagling but I just nixed the tin foil and rigged up this wire thing. I thought it looked cuter anyway. 

Of course now I see that the tinfoil is supposed to protect the cork, which makes sense since my cork started on fire every time I tried to light the wick. For some reason I just figured the cork wouldn't burn. It does. Smells good though. 

This is NOT a kid friendly craft by the way. 

Anyway. After it burnt the wick and then the cork the flame just dies out. After several more attempts I give up, and clean up, before the husband finds out that I'm playing with fire. He's under enough stress as it is. 

A quick online search gives me some ideas on how to actually make this work. It appears that I should have at least a 6-ply cord or shoelace, I have 4-ply yarn, and I should cut the cork lengthwise to help it float. Maybe I can tackle these tomorrow. 

For now I'll just have some fun with the pics I took. Have a good, safe, weekend!


Saturday, June 16, 2012

Paddle Update

Finally did something with the old paddle I found in a dumpster.


First, I went shopping for iron on transfers. I wasn't exactly sure what I was looking for. I had been inspired by an artist who printed directly onto pieces of old wood. The effect was pretty cool. Sorry, I don't have a pic. Anyway, JoAnn's had some cute tea towel transfers and I thought I would give it a whirl, no idea if it would even transfer to a hunk of wood. 


If you are interested this is what you're looking for: 

Designs were limited in the store, but there are a bunch online. I chose this:

Just follow the instructions on the package. It turned out pretty well. I ended up adding 3 flowers. I may fill in with paint later, or not, I have yet to decide. The paddle now hangs proudly in my home!

Have a great weekend!

Sunday, June 10, 2012

Wrap turned Ugly Blanket

So, making my way through my crochet binder and came across this: 


Easy enough summer knit. I pictured myself wearing it around a campfire, roasting marshmallows and reliving old memories. Then I remembered that I haven't been camping in ages, and Missouri summer nights are not like Wisconsin summer nights. They are hot, and sticky, and I would never be able to wear this anyway. So instead of making 2 panels, I just kept on going. I have a huge stash of yarn that must go and it's going in the form of an ugly blanket, er, retro blanket. 


I will be posting the pattern for anyone who may actually want to make and use the wrap. Its really easy, just double crochet the whole way! 

Monday, May 21, 2012

Weekend Craft Project

Picked up an old fireplace screen for $2 at an estate sale over the weekend. 
A little elbow grease, and ta-daa!


Sunday, May 13, 2012

Dumpster Find of the Week!

Find this beauty today. Not sure what I'll do with it, but I couldn't leave it in the dumpster. Plus it was in a recycling, paper only, dumpster. Who would have thought I would find a paddle? Just one. 


Sunday, March 25, 2012

Knitting in Springtime

It's always harder to knit when the weather is warm. 
It seems a bit unnatural. 
But I have an entire binder full of knits to get through. 
I better get started. 

Sunday, January 29, 2012

Apron Success!

Well, I had to do a little tweaking but I think the apron is a success!
The original pattern called for mercerized cotton thread but I didn't have enough and I could not get the correct gage using what I had. Something must have changed from the 60's. Either crochet hook size or thread count. Of course, crochet is not my forte.
Anyway, this is what I came up with. I gave it my own spin.


The color gives it that extra vintage feel. 

Not quite finished. Still have to weave in loose ends and find a better fitting ribbon but I think it turned out well. I like it so much I think this summer I will make a cute skirt using the same pattern/idea. Although a lighter yarn would be better. I used "I Love This Yarn" 4 ply worsted. 

Monday, January 2, 2012

A Homemade Christmas

Homemade Christmas 2011 was a success! And more rewarding than I think we all imagined. My family is so amazingly talented! 

Here's some of what was made: 

My brother made our dad an amazing walking stick. This pic does not do it justice. He even carved in my dad's initials and a quote. Beautiful. 

This is the hat I made for dad. It says DIG IT! Not to be confuse with digit... My dad worked as a backhoe operator for most of his life and owns his own Dynahoe. Still working hard even though he's technically retired. 

This is the painting my brother made for Hubs and I. We love it. This, weirdly, reminds us of the Wisconsin/Minnesota we miss. 

This is what I made for mom. She was a tough one. I hope she likes it. 

This is what dad made for Hubs. A "manly" desk organizer as he called it. 

This is the less manly? organizer he made me. Love it! Made from 100 yr old reclaimed wood. It smells so good. Sometimes you just got to stop to sniff the wood, you know?


This is the quilt mom made for Hubs and I. We love it! As do the cats. It's so beautiful and perfect. She did a fantastic job!

Here's my sister's gift to Hubs...I brought it home to finish...

Here's my sis's gift to me. Finished. She's more of a sewer than knitter. It's a knitting needle travel thing so I don't have to lug my big bag around on a plane. Super cute!


This is the hat I made for my sis. The moment I came across it I knew I had to make her one. Hope she wears orange while wearing it. 


Well that's not everything but most. My husband's contribution was making food. He made 2 breakfasts, and his amazing bread pudding. 


Reasons to love a homemade Christmas

  1. I didn't have to fight the crowds at the mall. Seriously, that was a wonderful, albeit strange feeling. 
  2. It's super personal. Not only is it handmade, but handmade for you. So much thought is put into each gift. You're not just giving a generic "one fits all" gift. 
  3. Because we currently live far from family it was like being able to take a piece of everyone home with me. Every time I look at our gifts I can't help but think of my family and get a warm and fuzzy feeling.
  4. Depending on what you decide to do it can be relatively low cost. The hats cost only a few bucks in yarn. The desk organizers were made from wood dad already had. The walking stick was found in the woods. 
  5. Appreciation. You know the work that went into it, and how much you put into yours. You now love it that much more. 
Well, I know Christmas is over, but I hope you consider this idea for the next. I know we are doing it again and this time we have the whole year to decide and make everyone something unique and awesome! 

Hope everyone had a great Christmas, and very happy new year!! Can't wait to see what 2012 has to bring!!!!!